 Skip to content
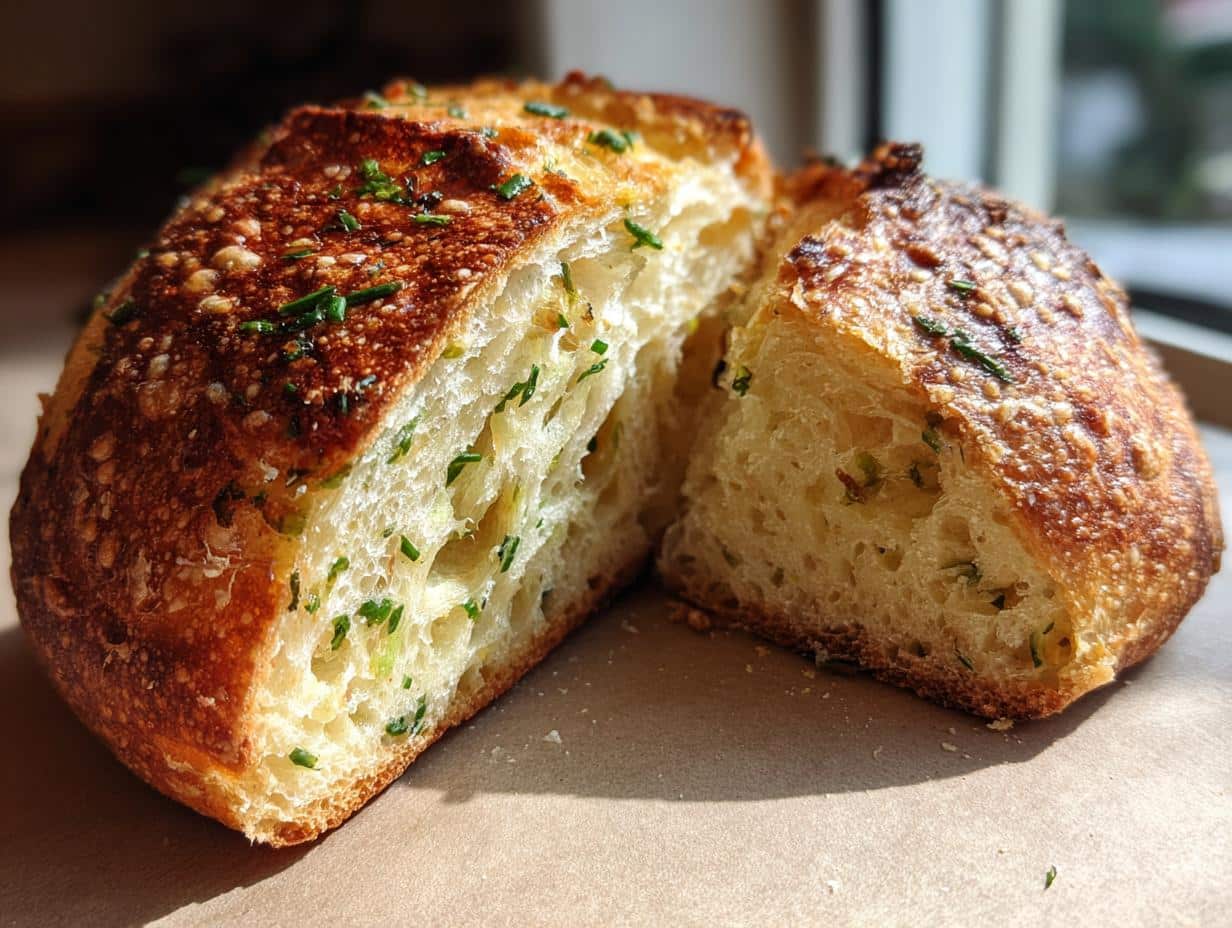
Oh, hello there! Welcome to my little corner of the internet where the smells of home cooking are always wafting. If you’re looking for an herb bread recipe that’s as easy as it is delicious, you’ve found it! I remember my granny’s kitchen always being filled with the most amazing scents, and this rustic herb bread brings me right back there. It’s honestly perfect for anyone who’s just starting out with baking, or even if you’re a seasoned pro looking for a quick, comforting loaf. Trust me, this simple, flavorful bread will become your new go-to!
Why You’ll Love This Herb Bread Recipe
There are so many reasons to adore this simple herb bread. Here’s why it’s a winner:
- Super Easy to Make: Seriously, it’s practically foolproof!
- Uses Fresh Herbs: That fragrant, amazing flavor comes from real herbs.
- Perfect for Beginners: If you’ve never baked bread before, this is your starting point.
- Delicious Flavor: It’s so wonderfully savory and aromatic.
- Rustic Appeal: It looks as good as it tastes, with that lovely homemade charm.
- Versatile for Meals: It’s fantastic with dinner, soups, or just on its own!
Gathering Your Ingredients for the Perfect Herb Bread Recipe
Alright, let’s get our ingredients ready for this absolute gem of an herb bread recipe! Having everything measured out makes the whole process so much smoother. You’ll need just a few simple things you probably already have in your pantry, plus some lovely fresh herbs. For the best flavor, I always recommend using fresh herbs if you can – they really make a difference!
Yeast Activation: The First Step in Your Herb Bread Recipe
First things first, we need to wake up our yeast. Grab a small bowl, pop in your yeast, a teaspoon of sugar, and the warm water. Make sure that water is just right – around 105-115°F (40-46°C). If it’s too hot, it’ll kill the yeast, and if it’s too cold, it won’t wake up. Give it about 5 to 10 minutes, and you should see a lovely foamy layer on top. That’s your sign it’s ready to go! For more on yeast activation, you can check out this guide to yeast.
Combining Dry and Wet Ingredients for Herb Bread
Now, in a big bowl, whisk together your all-purpose flour and salt. Then, pour in that bubbly yeast mixture, your chopped fresh herbs (rosemary and thyme are divine here!), and that tablespoon of olive oil. Stir it all up until it starts to look like a shaggy dough. Don’t worry if it’s not perfectly smooth yet; that’s what kneading is for!
Crafting Your Rustic Herb Bread Recipe: Kneading and Rising
Now comes the fun part – transforming that shaggy dough into something beautiful! Turning this into a proper rustic herb bread recipe really hinges on a bit of kneading and letting it rise just right. It’s not complicated at all, just a bit of patience!

The Art of Kneading Your Herb Bread Dough
Turn your dough out onto a lightly floured surface. You’ll want to knead it for about 5 to 7 minutes. Just push, fold, and turn. You’re looking for a dough that feels smooth and elastic, almost like a soft earlobe. If you poke it gently and it springs back slowly, you know you’ve developed that gluten beautifully for your herb bread recipe!
Allowing Your Herb Bread to Rise to Perfection
Once it’s kneaded, lightly grease a clean bowl with a little olive oil. Pop your dough in there and turn it to coat. Cover it up with plastic wrap and find a nice, warm spot for it to do its thing. It needs to rise for about 1 to 1.5 hours, or until it’s noticeably doubled in size. You’ll see it puff up like a happy cloud! After that first rise, gently punch it down – it’s so satisfying! – and then shape it into a round or oval loaf. Put it on your parchment-lined baking sheet, cover it loosely again, and let it have another rise for about 30-45 minutes. This second rise is key for that light, airy texture in your herb bread recipe.
Baking Your Delicious Herb Bread Recipe to Golden Perfection
Okay, it’s time to get this beautiful herb bread into the oven! Preheat your oven to a nice hot 400°F (200°C). Once it’s all warmed up, carefully place your shaped loaf onto a baking sheet lined with parchment paper. We’re going to bake it for about 25 to 30 minutes. You’ll know it’s ready when the crust turns a lovely golden brown and, if you tap the bottom, it sounds nicely hollow. That’s the sound of perfectly baked herb bread recipe!
Achieving the Perfect Crust on Your Herb Bread
Now, if you’re like me and love a really good, crisp crust, here’s a little trick for your herb bread recipe. Pop a small pan filled with water on the bottom rack of your oven while it preheats and bakes. The steam created helps the crust get wonderfully crispy and golden without drying out the inside. It’s a simple step that makes a big difference! This technique is often referred to as creating a steam environment for baking bread.
Serving and Storing Your Homemade Herb Bread
This lovely herb bread recipe is truly best served warm, straight from the oven! It’s perfect on its own, or you can slather it with a bit of butter. If you happen to have any leftovers (which is rare in my house!), just wrap it up tightly in plastic wrap or pop it into an airtight container. It should stay fresh for a couple of days. If it feels a little dry after a day or two, you can always give it a quick zap in the microwave for about 10-15 seconds to bring it back to life.
Frequently Asked Questions About This Herb Bread Recipe
Got questions about making this wonderful herb bread recipe? I’ve got answers!
Can I use dried herbs instead of fresh for this herb bread recipe?
Absolutely! If you don’t have fresh herbs, you can use dried. Just use about 1 teaspoon of dried herbs for every tablespoon of fresh. Gently rub the dried herbs between your fingers before adding them to release their flavour.
What other herbs work well in this herb bread recipe?
Oh, the possibilities are endless! Besides rosemary and thyme, basil, chives, oregano, or even a mix like herbes de Provence are fantastic in this herb bread recipe. Experiment and see what you love!
My dough didn’t rise, what could be wrong?
Don’t fret if your dough is being a bit stubborn! The most common culprits are water that was too hot or too cold for the yeast, or the yeast itself might be old. Make sure your water is the right temperature and your yeast is fresh. Also, ensure it’s in a warm spot away from drafts during its rise time.
Can I make this herb bread recipe ahead of time?
You sure can! You can prepare the dough, let it rise, punch it down, and then shape it. Cover it well and pop it in the fridge overnight. In the morning, let it sit at room temperature for about 30 minutes before baking as usual. It’s perfect for busy mornings!
Nutritional Estimate for Your Herb Bread Recipe
Just so you have a general idea, here’s an approximate nutritional breakdown for a slice of this delicious herb bread recipe. Keep in mind these numbers can vary a bit depending on the exact ingredients you use, like the type of flour or how much olive oil goes into your dough.
- Serving Size: 1 slice
- Calories: Around 150
- Fat: About 3g
- Protein: Roughly 4g
- Carbohydrates: Around 28g
- Sugar: Just about 2g
- Sodium: Approximately 200mg
- Fiber: About 1g
It’s a pretty wholesome slice, if I do say so myself!
Print
Easy Herb Bread Recipe: 1 Amazing Loaf
A simple and delicious homemade herb bread recipe, perfect for beginners. This rustic bread is infused with fresh herbs for a fragrant and flavorful loaf.
- Total Time: 2 hours 15 minutes
- Yield: 1 loaf 1x
Ingredients
- 1 teaspoon active dry yeast
- 1 teaspoon granulated sugar
- 1 cup warm water (105-115°F or 40-46°C)
- 2 ½ cups all-purpose flour, plus more for dusting
- 1 teaspoon salt
- 2 tablespoons chopped fresh herbs (such as rosemary, thyme, or parsley)
- 1 tablespoon olive oil, plus more for greasing
Instructions
- In a small bowl, combine the yeast, sugar, and warm water. Let stand for 5-10 minutes, until foamy.
- In a large bowl, whisk together the flour and salt.
- Add the yeast mixture, chopped herbs, and 1 tablespoon of olive oil to the flour mixture. Stir until a shaggy dough forms.
- Turn the dough out onto a lightly floured surface and knead for 5-7 minutes, until smooth and elastic.
- Lightly grease a clean bowl with olive oil. Place the dough in the bowl, turning to coat. Cover with plastic wrap and let rise in a warm place for 1-1.5 hours, or until doubled in size.
- Punch down the dough and shape it into a round or oval loaf. Place on a baking sheet lined with parchment paper.
- Cover loosely with plastic wrap and let rise for another 30-45 minutes.
- Preheat your oven to 400°F (200°C).
- Bake for 25-30 minutes, or until the crust is golden brown and the bread sounds hollow when tapped on the bottom.
- Let cool on a wire rack before slicing and serving.
Notes
- You can customize the herbs based on your preference.
- For a crispier crust, place a pan of water on the bottom rack of the oven while baking.
- This bread is best served warm.
- Prep Time: 15 minutes
- Cook Time: 30 minutes
- Category: Bread
- Method: Baking
- Cuisine: Irish
- Diet: Vegetarian
Nutrition
- Serving Size: 1 slice
- Calories: 150
- Sugar: 2g
- Sodium: 200mg
- Fat: 3g
- Saturated Fat: 0.5g
- Unsaturated Fat: 2.5g
- Trans Fat: 0g
- Carbohydrates: 28g
- Fiber: 1g
- Protein: 4g
- Cholesterol: 0mg