 Skip to content
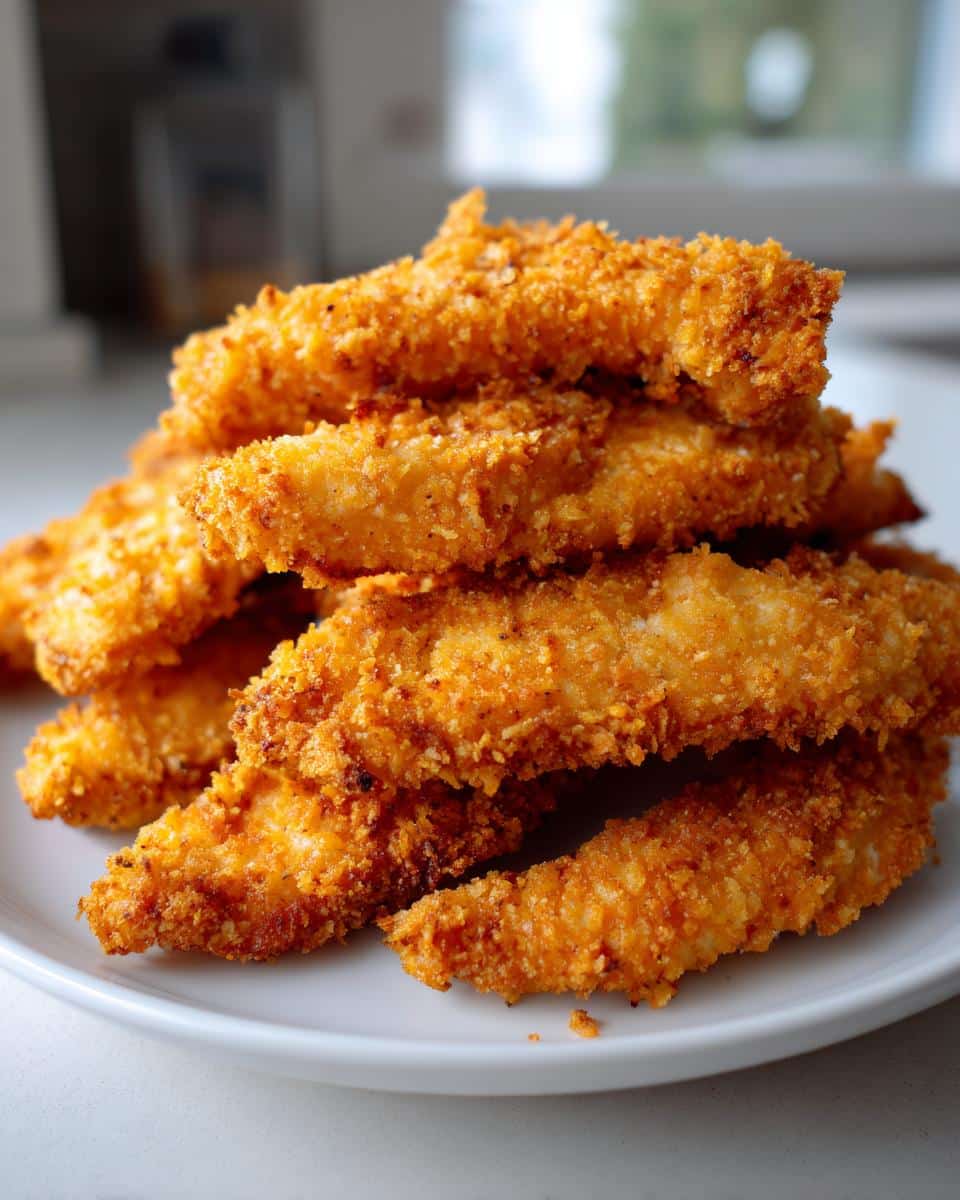
Okay, let’s talk chicken tenders! You know those moments when you’re craving that satisfying crunch, that golden, crispy bite, but you also want something that feels a little lighter, a little kinder to your family’s tummies? That’s exactly where these Crispy Oven-Baked Chicken Tenders come in. Forget the fuss and mess of deep frying; we’re unlocking that same amazing texture right in your oven. Honestly, I grew up with my granny making the most incredible comfort food, and while hers were always fried, I love finding ways to recreate that cozy feeling with simpler, healthier twists. These tenders are pure magic for a weeknight dinner, and trust me, even the pickiest eaters will be asking for seconds!
Why You’ll Love These Crispy Oven-Baked Chicken Tenders
Honestly, there are so many reasons to make these! They’re just fantastic for busy nights, taste amazing, and feel good to serve. Here’s why they’ll become a staple in your kitchen:
- Quick Weeknight Meal Solution: Seriously, you can get these from the fridge to the table in under an hour, making them a lifesaver for those crazy evenings when dinner needs to be fast and easy.
- Kid-Approved Flavor and Texture: The crunch is just *chef’s kiss*! They’re like homemade chicken nuggets but with that perfect oven-baked crispiness that kids absolutely adore.
- A Healthier Alternative: You get all the crispy, golden goodness without the guilt of deep frying. They’re a fantastic way to enjoy a family favorite while keeping things a bit lighter and healthier.
Gather Your Ingredients for Crispy Oven-Baked Chicken Tenders
Alright, let’s get everything ready so we can make these amazing tenders! It’s pretty straightforward, and having everything prepped makes the actual coating process a breeze. Trust me, gathering your bits and bobs first is key!
Chicken and Coating Essentials
First up, we need about 1.5 pounds of boneless, skinless chicken breasts. I like to cut them into nice, dippable strips – not too skinny, not too chunky. For our first coating station, we’ll grab 1 cup of all-purpose flour. If you need a gluten-free version, just swap this for a good gluten-free all-purpose flour blend. Then, for the flavor party in the flour, we’ll add 1 teaspoon of salt, 1 teaspoon of black pepper, 1 teaspoon of paprika for that lovely color, and 1/2 teaspoon of garlic powder. If you like a little kick, a pinch of cayenne pepper (about 1/4 teaspoon) is optional but so good!
The Binding and Breading Layers
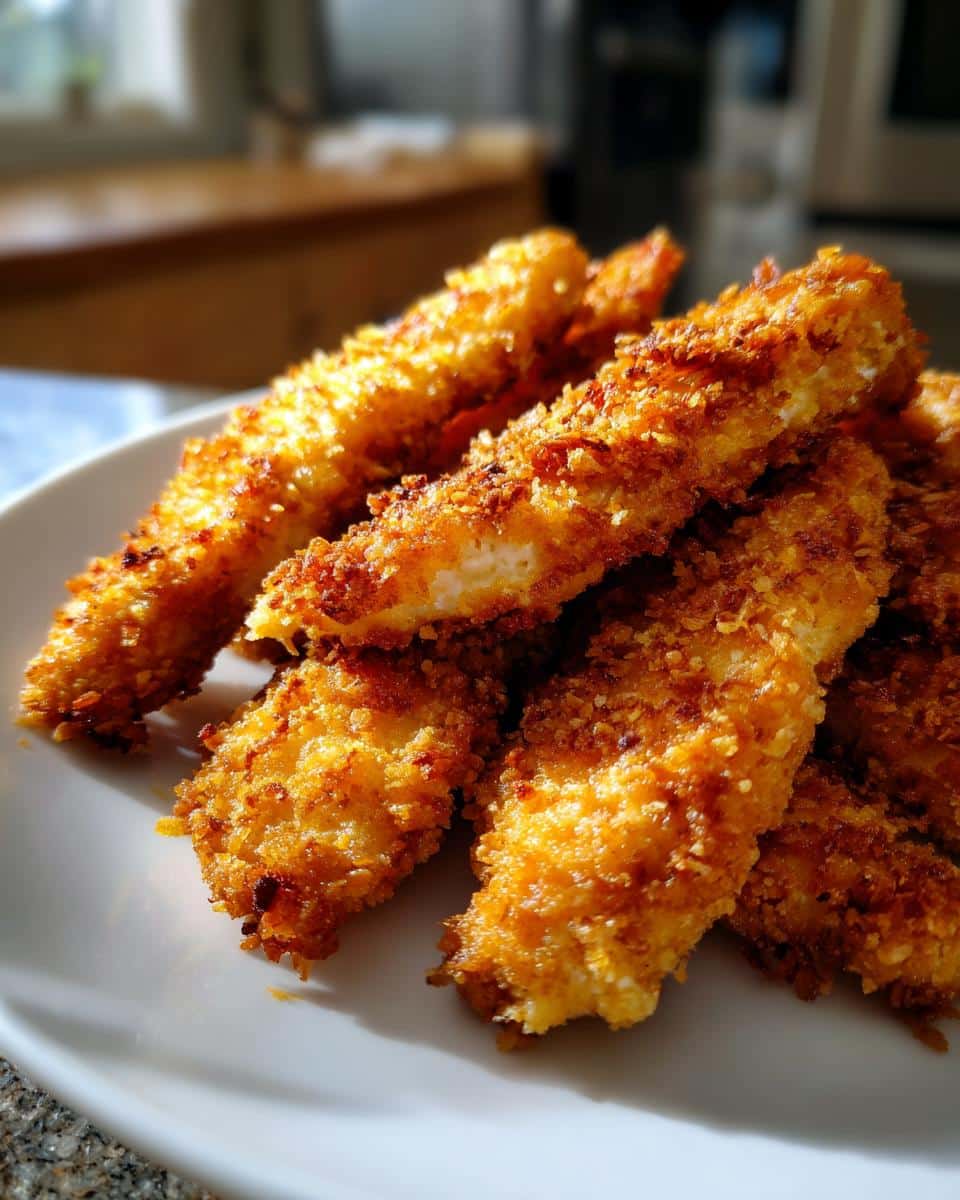
Next, we need something to make all that delicious seasoning stick! You’ll need 2 large eggs, whisked up in a bowl. This is our sticky binder. And for that irresistible crunch? That’s where the panko breadcrumbs come in – about 1.5 cups of them. Panko is my absolute favorite for these panko crusted chicken tenders because they get SO much crispier than regular breadcrumbs. Make sure you’ve got them in a separate dish, ready to go.
For That Extra Crisp
To really nail that golden, crispy finish without frying, we’re going to use a bit of cooking spray or a light drizzle of olive oil. This little bit of fat helps the panko toast up beautifully in the oven. So, just have your cooking spray or a little olive oil handy to give the tenders a quick spray or drizzle before they hit the oven.
Step-by-Step Guide to Perfect Crispy Oven-Baked Chicken Tenders
Alright, let’s get these tenders coated and into the oven! This part is really satisfying, watching them transform from raw chicken into perfectly crispy little golden bars. It’s like a little kitchen magic show, and it’s not complicated at all!
Preparing the Coating Stations
First things first, let’s get our assembly line ready. You’ll need three shallow dishes. In the first one, put your seasoned flour mixture. In the second, pour your beaten eggs. And in the third, pile up those glorious panko breadcrumbs. Having them all set up like this makes the dredging process so much smoother, and you can get each chicken tender coated quickly before anything starts to get soggy. It’s all about efficiency!
Dredging and Breading Technique
Now for the fun part! Grab one chicken tender strip. First, we’re going to give it a good roll in the seasoned flour. Make sure it’s completely coated, then give it a little shake to get rid of any excess. Next, dip that floured tender into the beaten eggs, letting any extra drip back into the bowl. This egg bath is what helps the panko stick like glue! Finally, drag the egg-coated tender through the panko breadcrumbs. Press down gently with your fingers to really pack those crumbs on there. We want a nice, thick, and even coating. Repeat this for every single tender strip. It’s a bit of a process, but oh-so-worth-it for that crunch!

Baking for Ultimate Crispiness
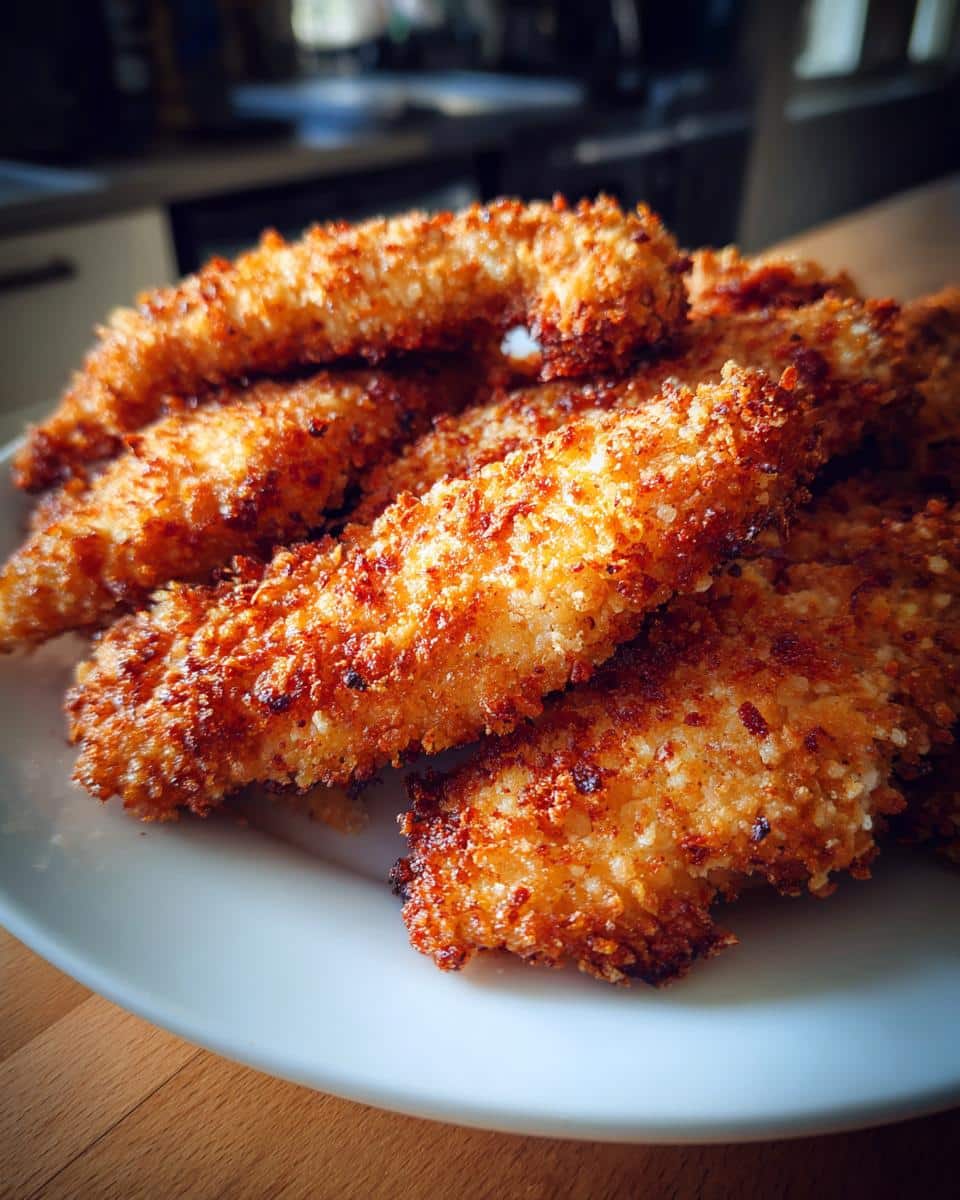
Okay, our tenders are all breaded and beautiful! Now, let’s get them into the oven. Make sure your oven is preheated to a nice hot 400°F (200°C). Line a baking sheet with parchment paper – this is a lifesaver for cleanup – and give it a quick spray of cooking spray or a light brush of olive oil. Arrange your coated chicken tenders on the prepared baking sheet in a single layer. Don’t crowd them! They need a little space to get crispy. Give the tops another light spray of cooking spray or a tiny drizzle of olive oil. Pop them into the oven for about 20-25 minutes. The key to that all-over crispiness? Flip them halfway through! Once they’re golden brown and cooked through, you’re golden. A good way to check is to make sure the internal temperature reaches 165°F (74°C), or just cut into one to be sure it’s not pink inside. For more on safe chicken temperatures, check out the USDA’s guidelines.
Tips for Success with Crispy Oven-Baked Chicken Tenders
Getting these tenders just right is all about a few little tricks I’ve picked up. It’s not complicated, but these small things really make a difference to that perfect crispy finish!
Achieving Maximum Crunch
The biggest secret to getting that amazing crunch is making sure the tenders have room to breathe in the oven. Don’t pile them up on the baking sheet – give them space! Also, that light spray of oil or cooking spray on top before baking really helps toast the panko to golden perfection. It’s the little things, you know?
Meal Prep and Storage Savvy
These are fantastic for making ahead! Once they’re cooled, store them in an airtight container in the fridge for up to 3 days. When you’re ready to reheat, pop them back on a baking sheet in a 375°F (190°C) oven for about 5-10 minutes. This brings back that lovely crispiness much better than a microwave ever could. Perfect for packed lunches or a quick dinner!
Serving Your Crispy Oven-Baked Chicken Tenders
These tenders are so versatile, they’re practically begging for some delicious friends! Whether you’re serving them up for a quick family dinner or a fun snack, having the right sides and dips makes them even better. It’s all about creating that perfect, comforting meal experience.
Delicious Dipping Sauce Pairings
You absolutely can’t go wrong with a classic ketchup or barbecue sauce. But why stop there? A creamy honey mustard, a zesty ranch, or even a spicy sriracha mayo are fantastic options that really complement the tender chicken.
Ideal Side Dish Companions
For a complete meal, keep it simple! These tenders pair wonderfully with some fluffy mashed potatoes, a fresh garden salad, some sweet corn on the cob, or even some crispy baked fries. Easy, crowd-pleasing sides are the way to go!
Frequently Asked Questions about Crispy Oven-Baked Chicken Tenders
Got questions about these crispy delights? I’ve got you covered! It’s always good to know the little details that make a recipe shine, and these tenders are no exception. Let’s dive into some common queries!
How to Make Crispy Chicken Tenders No Fry?
The magic really happens with a few key things! First, using panko breadcrumbs is a game-changer for that extra crunch. Then, making sure you dredge the chicken well in flour, egg, and then panko helps create a good coating. Finally, a hot oven (400°F!) and a little spray of oil on top before baking really helps toast those crumbs to crispy perfection without any deep frying.
Can I Make These Gluten-Free Baked Chicken Tenders?
Absolutely! It’s super simple to make these gluten-free baked chicken tenders. Just swap out the all-purpose flour in the first dish for a gluten-free all-purpose flour blend. And for the breadcrumbs, use gluten-free panko breadcrumbs instead of the regular ones. That’s it! You’ll get all the same amazing crispiness and flavor, just without the gluten.
Are These Easy Oven-Baked Chicken Tenders Good for Meal Prep?
Oh, definitely! These easy oven-baked chicken tenders are brilliant for meal prep. Once they’re baked and cooled, just pop them into an airtight container in the fridge for up to 3 days. When you’re ready to eat them, give them a quick warm-up in the oven (around 375°F for 5-10 minutes) to bring back that lovely crispiness. They’re perfect for lunches or a quick dinner later in the week!
Nutritional Snapshot
Just a little note on the nutrition info: the numbers you see are estimates, like a friendly guideline rather than a strict rulebook. They can change a bit depending on the exact brands of ingredients you use and how big your chicken strips happen to be. So, think of it as a helpful overview!
Share Your Crispy Oven-Baked Chicken Tender Creations!
I’d absolutely love to hear how your Crispy Oven-Baked Chicken Tenders turned out! Did you try any fun new dipping sauces? How did the kids like them? Please drop a comment below and let me know your thoughts, or even better, share a photo of your delicious creations! Your feedback truly makes my day and helps other home cooks too!

Ultimate Crispy Oven-Baked Chicken Tenders
Enjoy these incredibly crispy oven-baked chicken tenders. They are a healthier alternative to fried chicken, perfect for a quick weeknight meal or a family favorite. Made with simple ingredients and a crispy coating, these tenders deliver satisfying crunch without the deep fryer.
- Total Time: 40 minutes
- Yield: 4-6 servings 1x
Ingredients
- 1.5 lbs boneless, skinless chicken breasts, cut into strips
- 1 cup all-purpose flour
- 2 large eggs, beaten
- 1.5 cups panko breadcrumbs
- 1 teaspoon salt
- 1 teaspoon black pepper
- 1 teaspoon paprika
- 1/2 teaspoon garlic powder
- 1/4 teaspoon cayenne pepper (optional)
- Cooking spray or olive oil
Instructions
- Preheat your oven to 400°F (200°C). Line a baking sheet with parchment paper and lightly spray with cooking spray or brush with olive oil.
- In a shallow dish, combine the flour, salt, pepper, paprika, garlic powder, and cayenne pepper (if using).
- In another shallow dish, place the beaten eggs.
- In a third shallow dish, place the panko breadcrumbs.
- Dredge each chicken tender strip first in the flour mixture, ensuring it’s fully coated. Shake off any excess flour.
- Dip the floured chicken tender into the beaten eggs, letting any excess drip off.
- Finally, coat the chicken tender thoroughly with panko breadcrumbs, pressing gently to adhere.
- Place the coated chicken tenders on the prepared baking sheet in a single layer.
- Lightly spray the tops of the chicken tenders with cooking spray or drizzle with a little olive oil for extra crispiness.
- Bake for 20-25 minutes, flipping halfway through, until the chicken is cooked through and the coating is golden brown and crispy.
- Serve hot with your favorite dipping sauces.
Notes
- For gluten-free tenders, substitute gluten-free breadcrumbs and all-purpose flour.
- Ensure chicken is cooked to an internal temperature of 165°F (74°C).
- Adjust seasonings to your preference.
- These tenders can be made ahead and reheated in the oven for best results.
- Prep Time: 15 minutes
- Cook Time: 25 minutes
- Category: Main Course
- Method: Baking
- Cuisine: American
- Diet: Vegetarian
Nutrition
- Serving Size: 4 oz
- Calories: 350
- Sugar: 3g
- Sodium: 400mg
- Fat: 15g
- Saturated Fat: 4g
- Unsaturated Fat: 11g
- Trans Fat: 0g
- Carbohydrates: 30g
- Fiber: 2g
- Protein: 25g
- Cholesterol: 100mg