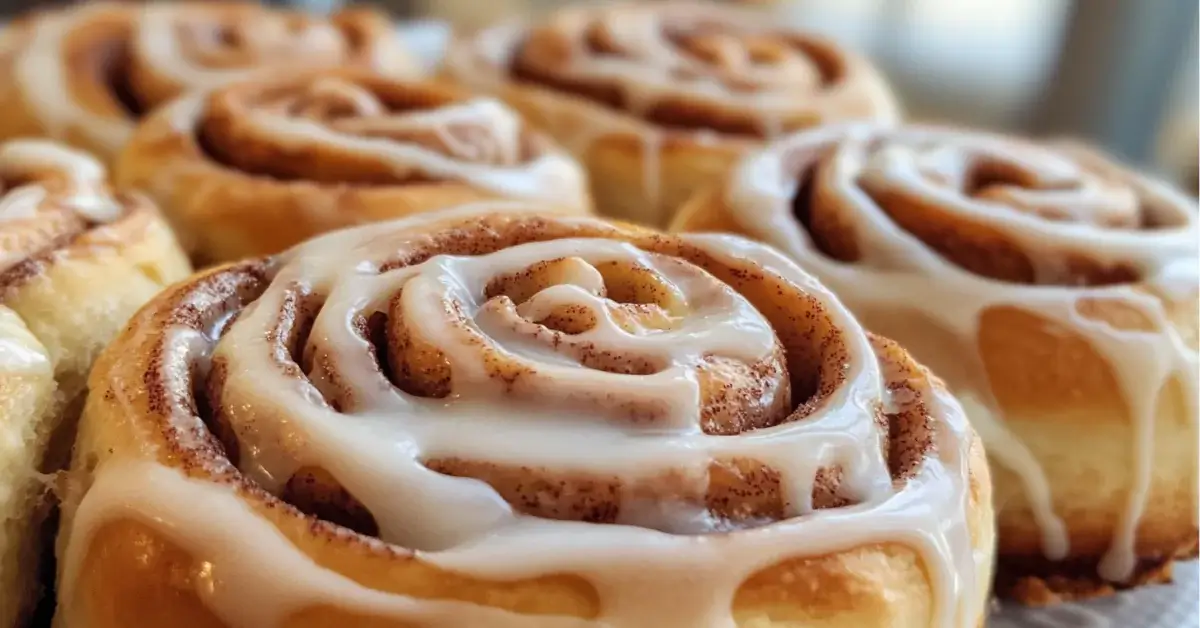
Introduction to Homemade Cinnamon Rolls
There’s something magical about the smell of freshly baked cinnamon rolls wafting through your home. The warm, sweet aroma can instantly lift your spirits and create a cozy atmosphere. Homemade cinnamon rolls are not just a treat; they are a delightful experience that brings people together. Whether it’s a lazy Sunday morning or a special occasion, these rolls are perfect for any time of the day.
The Joy of Baking Homemade Cinnamon Rolls
Baking homemade cinnamon rolls is a joyful activity that can be enjoyed by everyone. It’s a wonderful way to bond with family and friends. Imagine gathering in the kitchen, laughing and sharing stories while you knead the dough and roll it out. The process is simple yet rewarding, and the end result is a delicious treat that everyone will love.
Moreover, making cinnamon rolls from scratch allows you to customize them to your liking. You can experiment with different fillings, add nuts, or even try out various spices. The possibilities are endless! Plus, there’s nothing quite like the satisfaction of pulling a tray of warm, gooey rolls from the oven and drizzling them with sweet icing.
So, roll up your sleeves and get ready to embark on a delightful baking adventure. With just a few simple ingredients and a little bit of time, you can create homemade cinnamon rolls that will impress your family and friends. Let’s dive into the ingredients you’ll need to get started!
Ingredients for Homemade Cinnamon Rolls
Before you start baking, it’s important to gather all the necessary ingredients. Each component plays a vital role in creating the perfect homemade cinnamon rolls. Let’s break down what you’ll need for the dough, filling, and icing.
Essential Ingredients for the Dough
The dough is the foundation of your cinnamon rolls. Here are the essential ingredients:
- All-purpose flour: 4 cups provide structure and texture.
- Granulated sugar: 1/4 cup adds sweetness to the dough.
- Active dry yeast: 1 packet (2 1/4 tsp) helps the dough rise.
- Salt: 1 tsp enhances flavor and balances sweetness.
- Warm milk: 1 cup activates the yeast and adds moisture.
- Unsalted butter: 1/4 cup, melted, enriches the dough.
- Large eggs: 2 provide richness and help bind the ingredients.
Flavorful Filling Ingredients
The filling is what makes cinnamon rolls truly special. Here’s what you’ll need:
- Unsalted butter: 1/2 cup, softened, for spreading on the dough.
- Brown sugar: 1 cup, packed, adds a rich sweetness.
- Ground cinnamon: 2 tbsp, the star spice that gives cinnamon rolls their signature flavor.
- Chopped nuts: 1/2 cup (optional), for added crunch and flavor.
Icing Ingredients for the Perfect Finish
To top off your cinnamon rolls, you’ll need a simple yet delicious icing:
- Powdered sugar: 1 cup, for a sweet and creamy texture.
- Milk: 2 tbsp, to achieve the right consistency.
- Vanilla extract: 1/2 tsp, for a hint of flavor.
With these ingredients in hand, you’re ready to start your baking journey. Each element contributes to the delightful taste and texture of your homemade cinnamon rolls. Now, let’s move on to the step-by-step preparation!
Step-by-Step Preparation of Homemade Cinnamon Rolls
Now that you have all your ingredients ready, it’s time to dive into the fun part: preparing your homemade cinnamon rolls! Follow these simple steps to create delicious rolls that will fill your home with a delightful aroma.
Step 1: Mixing the Dry Ingredients
Start by taking a large mixing bowl. Combine 2 cups of all-purpose flour, granulated sugar, active dry yeast, and salt. Mix these dry ingredients well. This step is crucial as it ensures that the yeast is evenly distributed, which helps the dough rise properly.
Step 2: Combining Wet Ingredients
In a separate bowl, whisk together the warm milk, melted unsalted butter, and large eggs. Make sure the milk is warm, not hot, as this can kill the yeast. Once combined, pour this wet mixture into the bowl with the dry ingredients. Stir until everything is well mixed.
Step 3: Forming the Dough
Gradually add the remaining flour, one cup at a time. Keep stirring until a soft dough begins to form. You want the dough to be slightly sticky but manageable. If it feels too wet, add a little more flour until you reach the right consistency.
Step 4: Kneading the Dough
Next, turn the dough out onto a floured surface. Knead it for about 5-7 minutes. This process helps develop the gluten, making your rolls soft and fluffy. You’ll know it’s ready when the dough is smooth and elastic. Once done, place it in a greased bowl, cover it with a cloth, and let it rise in a warm place for about 1 hour, or until it doubles in size.
Step 5: Rolling Out the Dough
After the dough has risen, it’s time to roll it out. Lightly flour your work surface and roll the dough into a rectangle about 1/4 inch thick. Make sure to keep the edges as straight as possible. This will help you create even rolls.
Step 6: Adding the Filling
Now comes the fun part! Spread the softened butter evenly over the rolled-out dough. Then, sprinkle the packed brown sugar and ground cinnamon over the butter. If you’re using nuts, sprinkle them on top as well. Make sure to cover the entire surface for maximum flavor!
Step 7: Rolling and Slicing the Dough
Starting from one long edge, carefully roll the dough tightly into a log. Try to keep it as even as possible. Once rolled, slice the log into 12 equal pieces. A sharp knife or dental floss works great for this step, ensuring clean cuts.
Step 8: Second Rise of the Rolls
Place the sliced rolls in a greased baking dish. Make sure to leave some space between each roll, as they will expand during baking. Cover the dish and let the rolls rise for another 30 minutes. This second rise is essential for achieving that fluffy texture.
Step 9: Baking the Rolls
Preheat your oven to 350°F (175°C). Once the rolls have risen, bake them for 20-25 minutes. Keep an eye on them; you want them to be golden brown. The smell will be irresistible, and you’ll know they’re ready when they look perfect!
Step 10: Preparing the Icing
While the rolls are baking, prepare the icing. In a bowl, whisk together the powdered sugar, milk, and vanilla extract until smooth. Adjust the consistency by adding more milk or powdered sugar as needed. You want it to be pourable but not too runny.
Step 11: Icing the Rolls
Once the rolls are out of the oven, let them cool for a few minutes. Then, drizzle the icing over the warm rolls. The icing will melt slightly, creating a delicious glaze. Serve them warm and enjoy the delightful taste of your homemade cinnamon rolls!
With these steps, you’ll have a batch of homemade cinnamon rolls that are sure to impress. Now, let’s explore some variations to make your rolls even more exciting!
Variations of Homemade Cinnamon Rolls
While the classic homemade cinnamon rolls are delicious on their own, there are many fun variations you can try. These twists can add new flavors and textures, making your baking experience even more enjoyable. Let’s explore some exciting options!
Nut-Free Options
If you or someone you know has a nut allergy, you can easily make nut-free cinnamon rolls. Simply skip the chopped nuts in the filling. Instead, consider adding a sprinkle of raisins or dried cranberries for a sweet touch. These fruits will add a chewy texture and a burst of flavor without compromising the classic taste of your rolls.
Adding Different Spices
Spices can elevate your homemade cinnamon rolls to a whole new level. While cinnamon is the star, you can experiment with other spices. Try adding a pinch of nutmeg or allspice to the filling for a warm, cozy flavor. You could also mix in some cardamom for a unique twist. Just remember to adjust the amounts to suit your taste!
Creative Fillings to Try
Get creative with your fillings! Instead of the traditional brown sugar and cinnamon, consider using chocolate chips for a sweet surprise. You can also try a cream cheese filling for a rich and tangy flavor. Another fun option is to add fresh fruit, like sliced apples or berries, mixed with a bit of sugar and lemon juice. These fillings will give your cinnamon rolls a delightful twist that everyone will love.
With these variations, you can customize your homemade cinnamon rolls to suit any occasion or preference. Whether you stick to the classic recipe or try something new, the joy of baking remains the same. Now, let’s move on to some cooking notes to ensure your rolls turn out perfectly!
Cooking Note for Homemade Cinnamon Rolls
When it comes to baking homemade cinnamon rolls, a few tips can make all the difference. These simple guidelines will help you achieve perfectly baked rolls that are fluffy, flavorful, and utterly delicious. Let’s dive into some essential tips!
Tips for Perfectly Baked Rolls
First and foremost, pay attention to your yeast. Make sure it’s fresh and active. If your yeast is old, your dough may not rise properly. To test it, mix the yeast with warm water and a pinch of sugar. If it bubbles and foams after a few minutes, it’s good to go!
Next, the temperature of your ingredients matters. Using warm milk helps activate the yeast, but it should not be too hot. If it’s too hot, it can kill the yeast, preventing your dough from rising. Aim for a temperature around 110°F (43°C).
When kneading the dough, don’t rush it. Kneading develops gluten, which gives your rolls their structure. If the dough feels sticky, sprinkle a little flour on your work surface, but avoid adding too much. You want a soft, slightly tacky dough.
During the rising process, find a warm spot in your kitchen. Yeast loves warmth! If your kitchen is cool, you can preheat your oven to the lowest setting for a few minutes, then turn it off. Place the covered dough inside to rise.
Lastly, keep an eye on your rolls while they bake. Ovens can vary, so check for that golden brown color. If they start to brown too quickly, cover them loosely with aluminum foil to prevent burning.
By following these tips, you’ll be well on your way to baking the best homemade cinnamon rolls. Now that you have the cooking notes down, let’s explore some serving suggestions to enjoy your delicious creations!
Serving Suggestions for Homemade Cinnamon Rolls
Once your homemade cinnamon rolls are baked and iced, it’s time to think about how to serve them. These delightful treats can be enjoyed in various ways, making them perfect for any occasion. Here are some serving suggestions to enhance your cinnamon roll experience!
Best Pairings for Your Rolls
Homemade cinnamon rolls are delicious on their own, but pairing them with the right accompaniments can elevate your enjoyment. Here are some fantastic options:
- Coffee: A warm cup of coffee is a classic pairing. The rich, bold flavors of coffee complement the sweetness of the rolls perfectly. Whether you prefer a latte, cappuccino, or black coffee, it’s a match made in heaven.
- Tea: If coffee isn’t your thing, try pairing your rolls with a soothing cup of tea. Herbal teas, like chamomile or peppermint, can provide a refreshing contrast to the sweet rolls.
- Milk: A glass of cold milk is a timeless choice. The creamy texture of milk balances the sweetness of the icing, making each bite even more enjoyable.
- Fruit: Fresh fruit can add a burst of flavor and freshness. Consider serving your cinnamon rolls with sliced strawberries, blueberries, or even a fruit salad. The natural sweetness of the fruit complements the rolls beautifully.
- Ice Cream: For a decadent treat, serve your warm cinnamon rolls with a scoop of vanilla ice cream. The melting ice cream creates a delightful contrast with the warm, gooey rolls.
These pairings not only enhance the flavor of your homemade cinnamon rolls but also create a delightful experience for you and your guests. Whether it’s a cozy breakfast, a sweet snack, or a dessert, these rolls are sure to impress. Now that you have some serving ideas, let’s move on to tips for making the best homemade cinnamon rolls!
Tips for Making the Best Homemade Cinnamon Rolls
Creating the perfect homemade cinnamon rolls can be a delightful journey. However, there are a few common pitfalls that can occur along the way. By being aware of these mistakes and knowing how to avoid them, you can ensure that your rolls turn out fluffy, flavorful, and utterly irresistible. Let’s explore some common mistakes to avoid and tips for storing any leftovers!
Common Mistakes to Avoid
Even the most experienced bakers can make mistakes. Here are some common ones to watch out for:
- Using expired yeast: Always check the expiration date on your yeast. If it’s old, it may not activate properly, leading to dense rolls.
- Not measuring ingredients accurately: Baking is a science. Use measuring cups and spoons for accuracy. Too much or too little of an ingredient can affect the dough’s texture.
- Skipping the first rise: Allowing the dough to rise is crucial. Skipping this step can result in tough rolls. Be patient and let the dough double in size.
- Overbaking: Keep an eye on your rolls while they bake. Overbaking can lead to dry rolls. They should be golden brown and soft to the touch.
- Not letting the rolls cool before icing: If you ice the rolls while they are too hot, the icing will melt away. Let them cool for a few minutes before drizzling the icing on top.
By avoiding these common mistakes, you’ll be well on your way to baking the best homemade cinnamon rolls. Now, let’s talk about how to store any leftovers you might have!
Storage Tips for Leftover Rolls
Homemade cinnamon rolls are best enjoyed fresh, but if you have leftovers, here’s how to store them properly:
- Room Temperature: If you plan to eat the rolls within a day or two, store them in an airtight container at room temperature. This will keep them soft and fresh.
- Refrigeration: For longer storage, you can refrigerate the rolls. Place them in an airtight container or wrap them tightly in plastic wrap. They can last up to a week in the fridge.
- Freezing: If you want to keep your rolls for an extended period, freezing is a great option. Wrap each roll individually in plastic wrap, then place them in a freezer-safe bag. They can be frozen for up to three months. To enjoy, simply thaw them in the refrigerator overnight and reheat in the oven.
With these storage tips, you can enjoy your homemade cinnamon rolls even after the initial baking day. Now that you’re equipped with all the knowledge to make and store your rolls, let’s break down the time it takes to create these delicious treats!
Breakdown of Time for Homemade Cinnamon Rolls
Understanding the time required to make homemade cinnamon rolls can help you plan your baking session better. Here’s a detailed breakdown of the time involved in each step of the process, so you know exactly what to expect.
Prep Time
The prep time for homemade cinnamon rolls is approximately 30 minutes. This includes gathering your ingredients, mixing the dough, and preparing the filling. It’s a good idea to have everything ready before you start. This way, you can enjoy the process without feeling rushed. Remember, the joy of baking comes from taking your time!
Cooking Time
Once your rolls are ready to bake, the cooking time is about 25 minutes. During this time, your kitchen will fill with the delightful aroma of cinnamon and sugar. Keep an eye on the rolls as they bake, ensuring they turn golden brown. The cooking time is crucial for achieving that perfect texture!
Total Time
In total, you can expect to spend around 55 minutes from start to finish. This includes the prep time, cooking time, and the necessary rising periods for the dough. While it may seem like a bit of a commitment, the end result is well worth it. You’ll have a batch of warm, gooey homemade cinnamon rolls that are sure to impress!
Now that you have a clear understanding of the time involved, you can plan your baking adventure accordingly. Let’s move on to the nutritional information for your delicious homemade cinnamon rolls!
Nutritional Information for Homemade Cinnamon Rolls
When indulging in homemade cinnamon rolls, it’s essential to understand their nutritional content. While these treats are undeniably delicious, knowing what’s in them can help you enjoy them mindfully. Let’s break down the calories and macronutrients, as well as some health considerations to keep in mind.
Calories and Macronutrients
Each homemade cinnamon roll contains approximately 250 calories. This number can vary slightly based on the specific ingredients and portion sizes used. Here’s a general breakdown of the macronutrients you can expect in one roll:
- Carbohydrates: About 36 grams, primarily from the flour and sugar.
- Protein: Approximately 4 grams, mainly from the eggs and milk.
- Fat: Roughly 10 grams, coming from the butter and any optional nuts.
These rolls are a delightful treat, but they are also rich in carbohydrates and sugars. Therefore, it’s wise to enjoy them in moderation, especially if you’re watching your calorie intake. Pairing them with a source of protein, like a glass of milk, can help balance your meal.
Health Considerations
While homemade cinnamon rolls are a tasty indulgence, there are a few health considerations to keep in mind:
- Moderation is Key: Enjoying cinnamon rolls occasionally is perfectly fine. However, consuming them daily may lead to excess sugar and calorie intake.
- Allergies: Be mindful of any allergies, especially to gluten or dairy. You can modify the recipe using gluten-free flour or dairy alternatives if needed.
- Balance Your Diet: If you plan to enjoy cinnamon rolls, consider balancing your diet with plenty of fruits, vegetables, and whole grains throughout the day.
- Homemade vs. Store-Bought: Homemade cinnamon rolls often contain fewer preservatives and artificial ingredients compared to store-bought options. This makes them a healthier choice overall.
By being aware of the nutritional information and health considerations, you can savor your homemade cinnamon rolls while maintaining a balanced diet. Now that you have a good understanding of their nutritional value, let’s move on to some frequently asked questions about homemade cinnamon rolls!
FAQs About Homemade Cinnamon Rolls
As you embark on your journey to create delicious homemade cinnamon rolls, you may have some questions. Here are some frequently asked questions that can help you navigate the baking process and enjoy your rolls to the fullest!
Can I make Homemade Cinnamon Rolls ahead of time?
Absolutely! You can prepare your homemade cinnamon rolls ahead of time. After you’ve rolled and sliced the dough, place the rolls in a greased baking dish. Cover them tightly with plastic wrap and refrigerate overnight. In the morning, let them sit at room temperature for about 30 minutes before baking. This way, you can enjoy fresh rolls without the hassle of starting from scratch!
How do I store leftover Homemade Cinnamon Rolls?
If you have leftover cinnamon rolls, storing them properly is key to keeping them fresh. Place the rolls in an airtight container at room temperature for up to two days. If you want to keep them longer, you can refrigerate them for up to a week. Just remember to reheat them in the microwave or oven before serving to restore their soft texture!
Can I freeze Homemade Cinnamon Rolls?
Yes, freezing homemade cinnamon rolls is a great option! To do this, wrap each roll individually in plastic wrap and then place them in a freezer-safe bag. They can be frozen for up to three months. When you’re ready to enjoy them, simply thaw the rolls in the refrigerator overnight and reheat them in the oven. This way, you can savor the taste of fresh cinnamon rolls anytime!
What can I substitute for the butter in the recipe?
If you’re looking for a butter substitute, there are several options available. You can use margarine or a plant-based butter alternative for a similar flavor and texture. For a healthier option, consider using unsweetened applesauce or Greek yogurt. These substitutes can add moisture while reducing the overall fat content. Just keep in mind that the flavor may vary slightly, but your rolls will still be delicious!
With these FAQs answered, you’re now equipped with the knowledge to tackle any challenges that may arise while making your homemade cinnamon rolls. Let’s wrap up our article with some final thoughts on enjoying your delightful creations!
Conclusion: Enjoying Your Homemade Cinnamon Rolls
Homemade cinnamon rolls are more than just a delicious treat; they are a celebration of warmth, comfort, and togetherness. After following the steps and tips outlined in this article, you now have the skills to create these delightful rolls in your own kitchen. The joy of baking is not only in the final product but also in the process itself. From mixing the dough to watching it rise, each step is filled with anticipation and excitement.
Once your homemade cinnamon rolls are baked and drizzled with icing, it’s time to enjoy them! Gather your family and friends around the table, and share the fruits of your labor. The warm, gooey rolls are perfect for breakfast, brunch, or even as a sweet afternoon snack. Pair them with a cup of coffee or tea, and you have a delightful experience that everyone will cherish.
Remember, the beauty of homemade cinnamon rolls lies in their versatility. Feel free to experiment with different fillings, spices, and toppings to make them your own. Whether you stick to the classic recipe or try out new variations, each batch will bring its own unique flavor and joy.
So, roll up your sleeves, embrace the process, and enjoy every bite of your homemade cinnamon rolls. They are sure to become a beloved staple in your home, creating sweet memories for years to come. Happy baking!
Print
Homemade Cinnamon Rolls are a delicious treat!
- Total Time: 55 minutes
- Yield: 12 rolls
- Diet: Vegetarian
Description
A delightful recipe for homemade cinnamon rolls that brings warmth and joy to any occasion.
Ingredients
- All-purpose flour: 4 cups
- Granulated sugar: 1/4 cup
- Active dry yeast: 1 packet (2 1/4 tsp)
- Salt: 1 tsp
- Warm milk: 1 cup
- Unsalted butter: 1/4 cup, melted
- Large eggs: 2
- Unsalted butter: 1/2 cup, softened (for filling)
- Brown sugar: 1 cup, packed
- Ground cinnamon: 2 tbsp
- Chopped nuts: 1/2 cup (optional)
- Powdered sugar: 1 cup (for icing)
- Milk: 2 tbsp (for icing)
- Vanilla extract: 1/2 tsp
Instructions
- Mix the dry ingredients in a large bowl.
- Combine the wet ingredients in a separate bowl.
- Gradually add the remaining flour to form the dough.
- Knead the dough for 5-7 minutes until smooth and elastic.
- Roll out the dough into a rectangle.
- Spread softened butter and sprinkle filling ingredients on the dough.
- Roll the dough tightly and slice into 12 pieces.
- Let the rolls rise in a greased baking dish for 30 minutes.
- Bake in a preheated oven at 350°F (175°C) for 20-25 minutes.
- Prepare the icing while the rolls are baking.
- Drizzle icing over warm rolls and serve.
Notes
- Ensure yeast is fresh for proper rising.
- Use warm milk, not hot, to activate yeast.
- Knead the dough thoroughly for best texture.
- Allow rolls to cool slightly before icing.
- Store leftovers in an airtight container.
- Prep Time: 30 minutes
- Cook Time: 25 minutes
- Category: Dessert
- Method: Baking
- Cuisine: American
Nutrition
- Serving Size: 1 roll
- Calories: 250
- Sugar: 10 grams
- Sodium: 200 mg
- Fat: 10 grams
- Saturated Fat: 5 grams
- Unsaturated Fat: 3 grams
- Trans Fat: 0 grams
- Carbohydrates: 36 grams
- Fiber: 1 gram
- Protein: 4 grams
- Cholesterol: 50 mg
Keywords: cinnamon rolls, homemade, baking, dessert, sweet rolls